Communication Between iNexBot and the IOA Simulation Platform
iNexBot and IOA simulation communicate via TCP/IP. For the simulation module, port 7000 is dedicated to robot control and data exchange through socket communication; the iNexBot teach pendant can also be used for robot control and data exchange, enabling online simulation and online control.
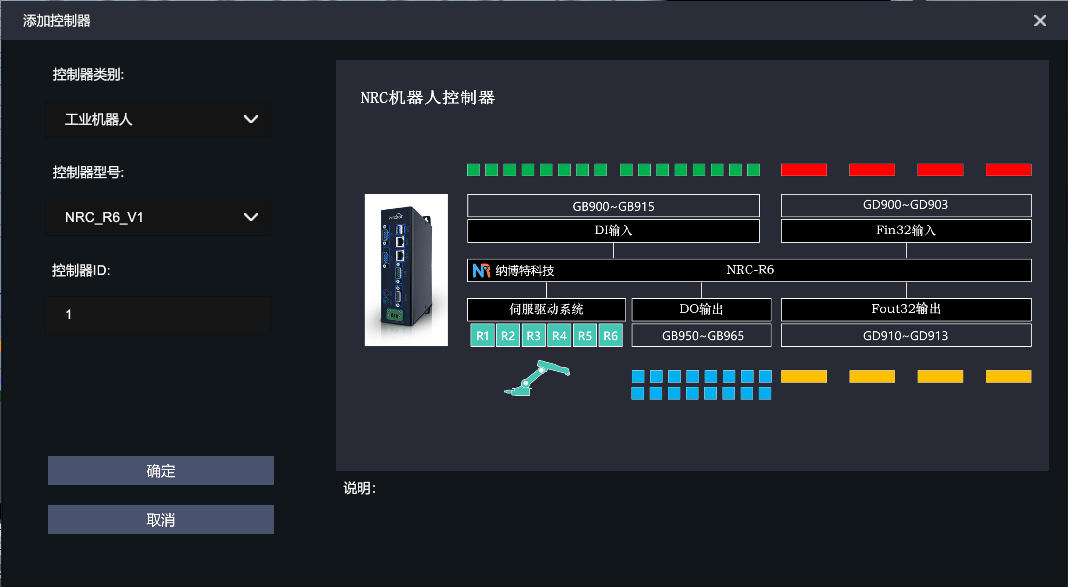
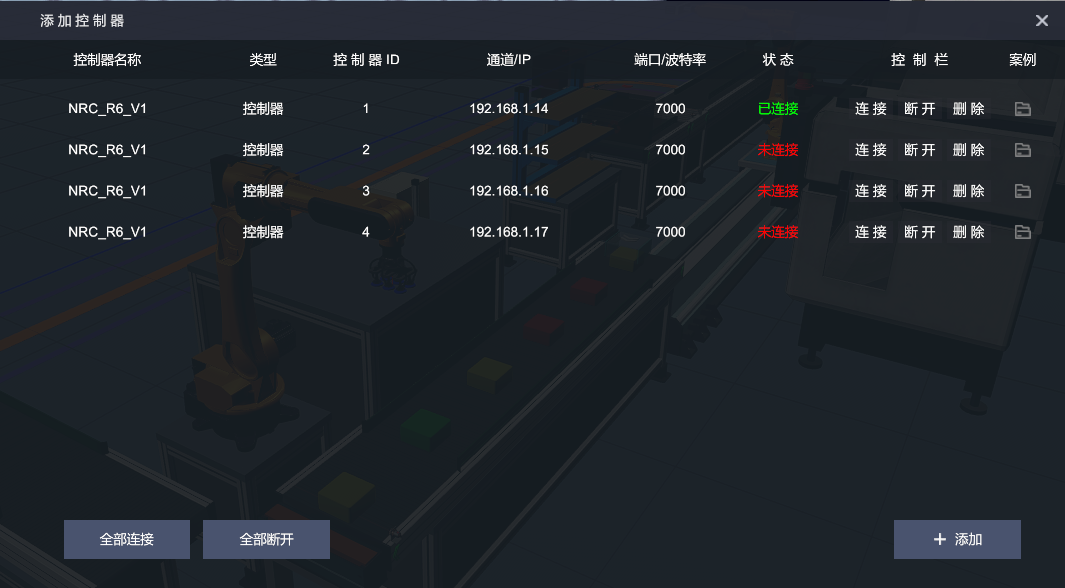
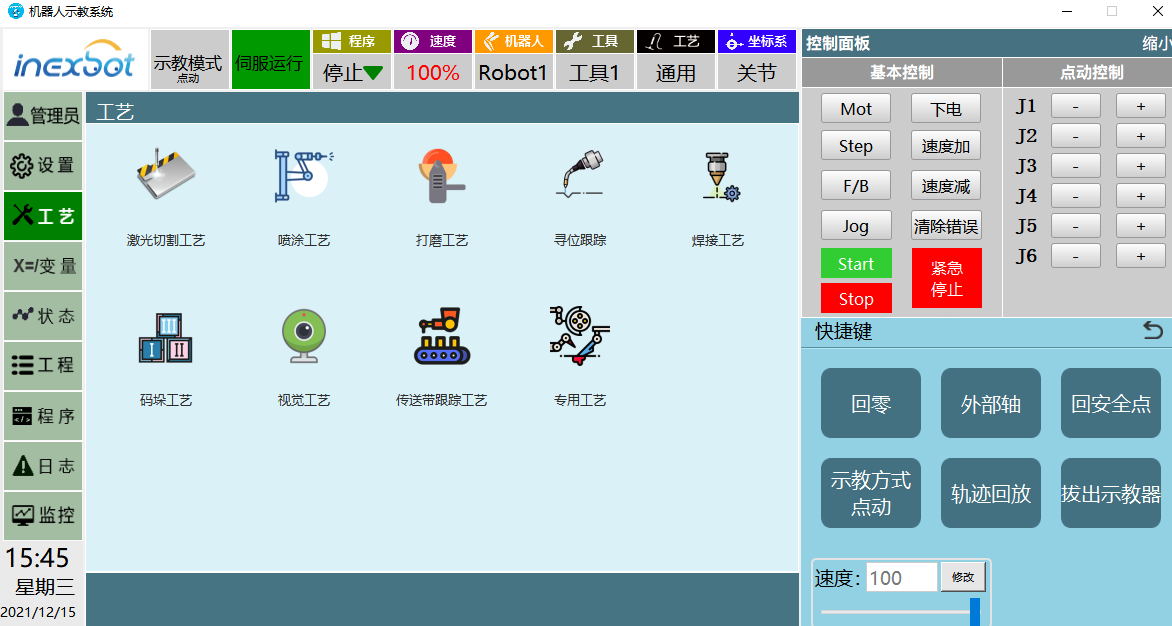
Creating a Palletizing Process
Each module of the system corresponds to a different process. To meet different market needs, the palletizing process module provides both simple palletizing and full palletizing, making it simpler and more convenient. Below, full palletizing is used as an example to build a palletizing simulation system.
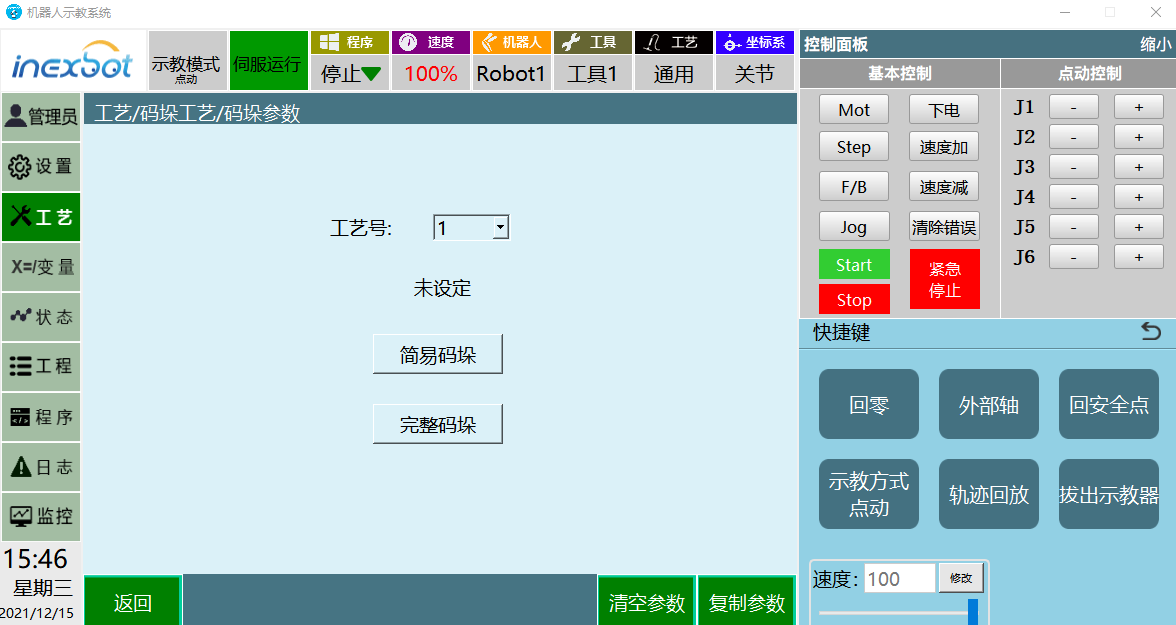
Based on real production environments, build conveyor lines, material generators, robots, sensors, stoppers and other mechatronic components in the virtual factory to complete the basic environment layout of a robot palletizing workstation.
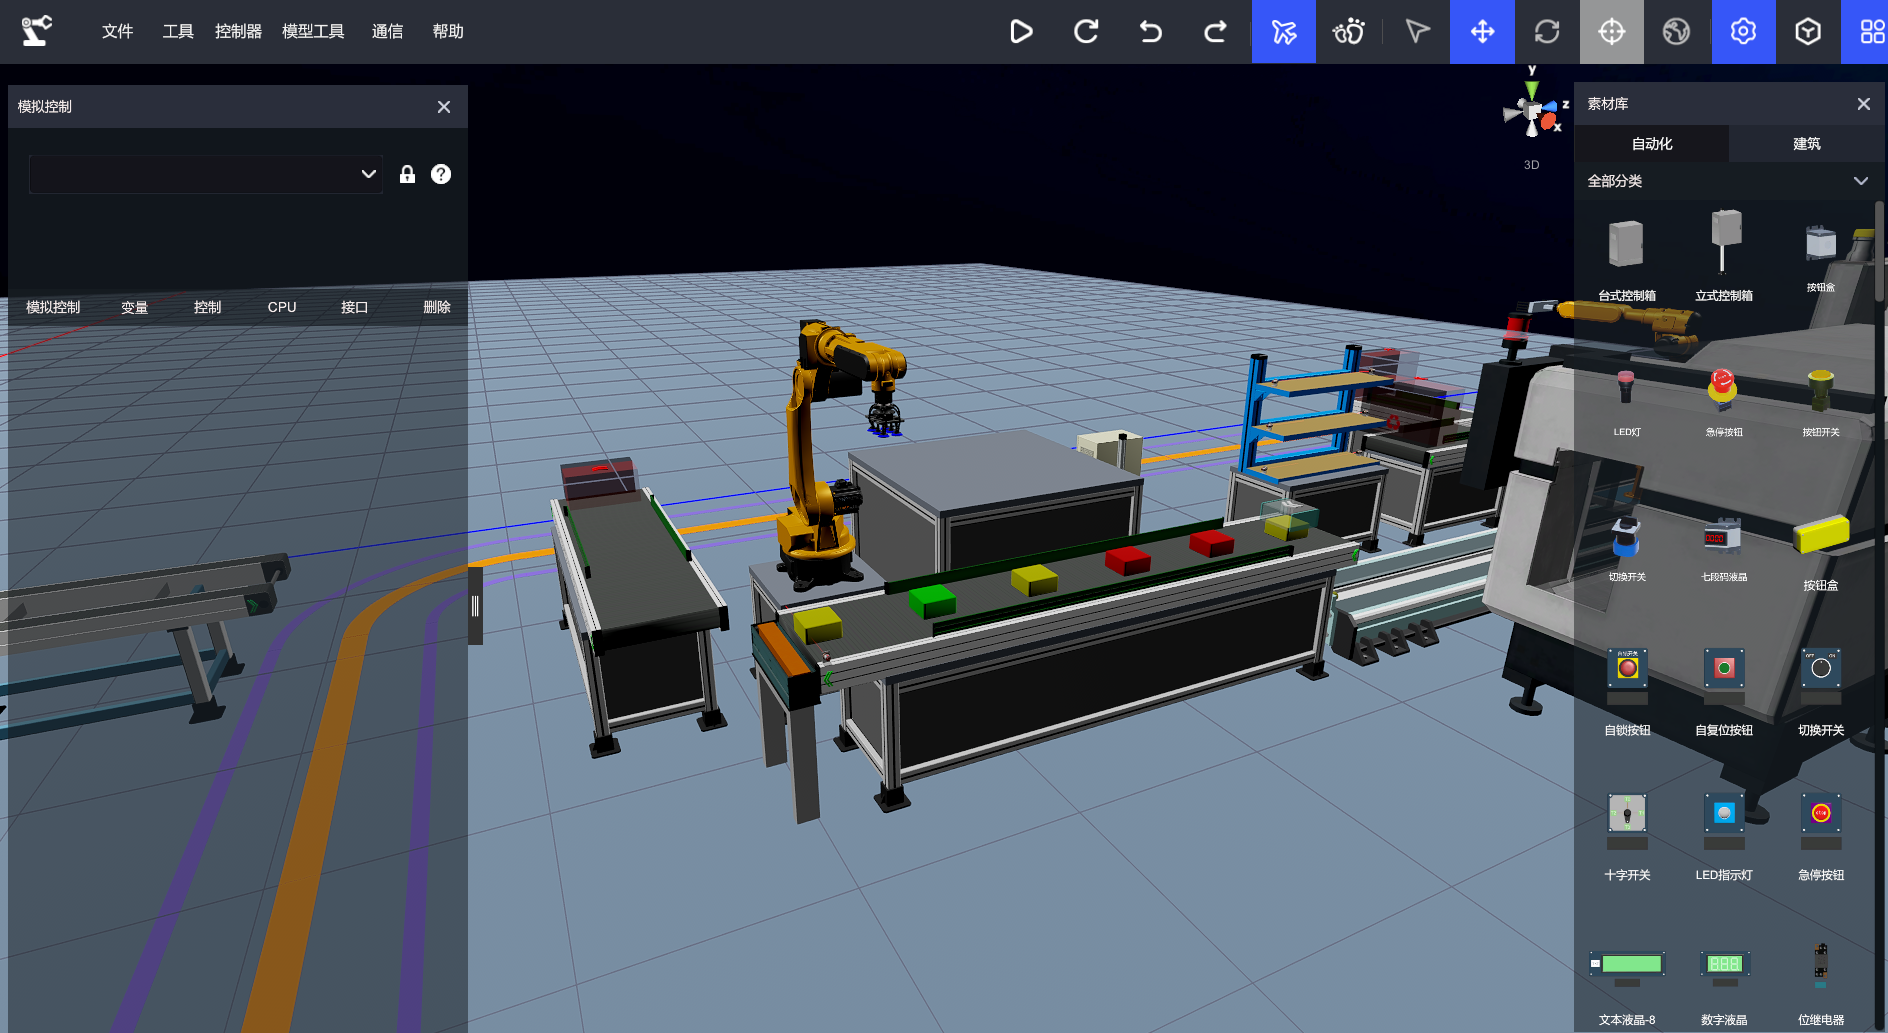
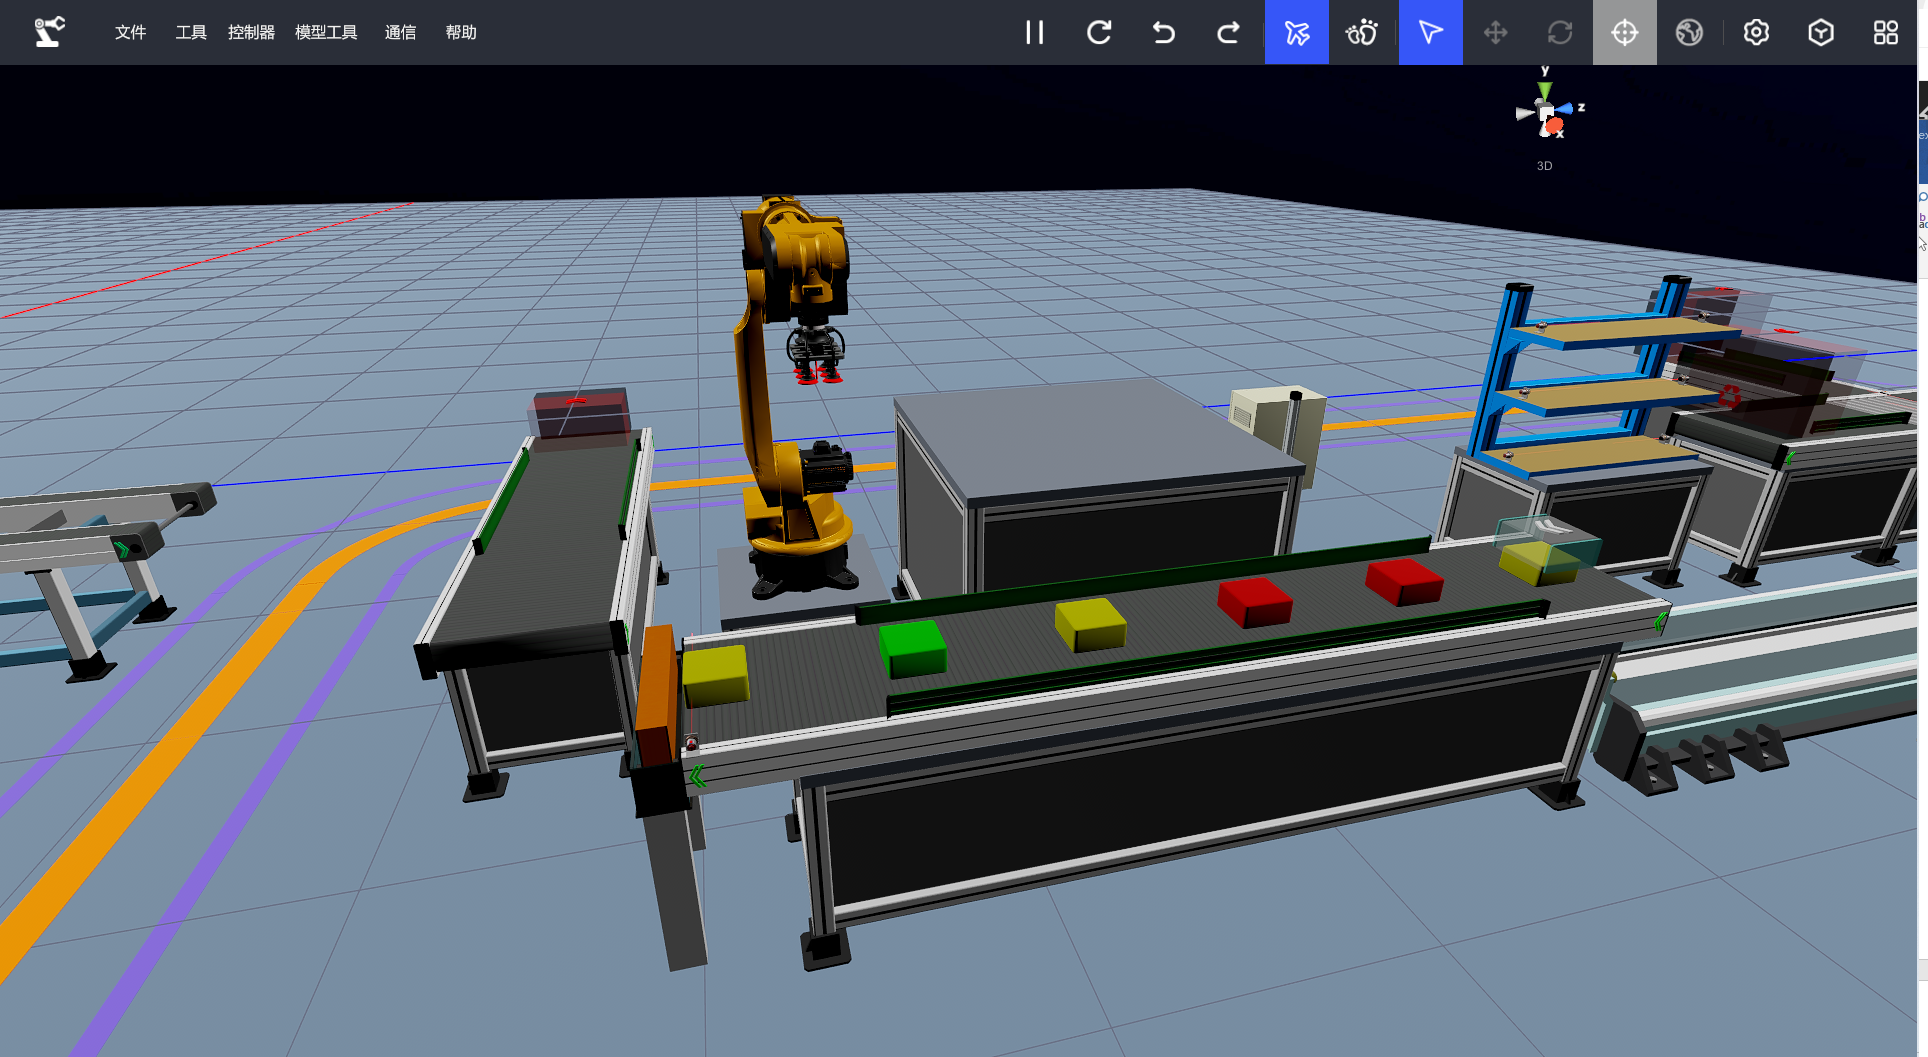
Model details and address allocation are as follows:
| No. | Scene model | Controller address allocation | Remarks |
|---|---|---|---|
| 1 | ER20-1600_1--R6 servo | NRC_R6_V1 R6 | Robot control |
| 2 | Matrix suction cup - gripper enable | NRC_R6_V1 GB950 | Suction cup enable |
| 3 | Geometry module generation - object generation | NRC_R6_V1 GB951 | Material generation |
| 4 | PV large belt_1--enable switch | NRC_R6_V1 GB952 | Material transport |
| 5 | PV large belt_2--enable switch | NRC_R6_V1 GB954 | Material transport |
| 6 | Self-locking button - closed | NRC_R6_V1 GB950 | System start |
| 7 | Diffuse reflection switch - blocked | NRC_R6_V1 GB951 | Material sensing |
| 8 | Stopper cylinder - enable | NRC_R6_V1 GB954 | Stop material from falling |
Once the basic environment is set up, move on to the palletizing process module settings:
Following the navigation, first set up the tool. The number of grippers can be set independently according to different needs, satisfying single-tool palletizing and multi-tool palletizing.
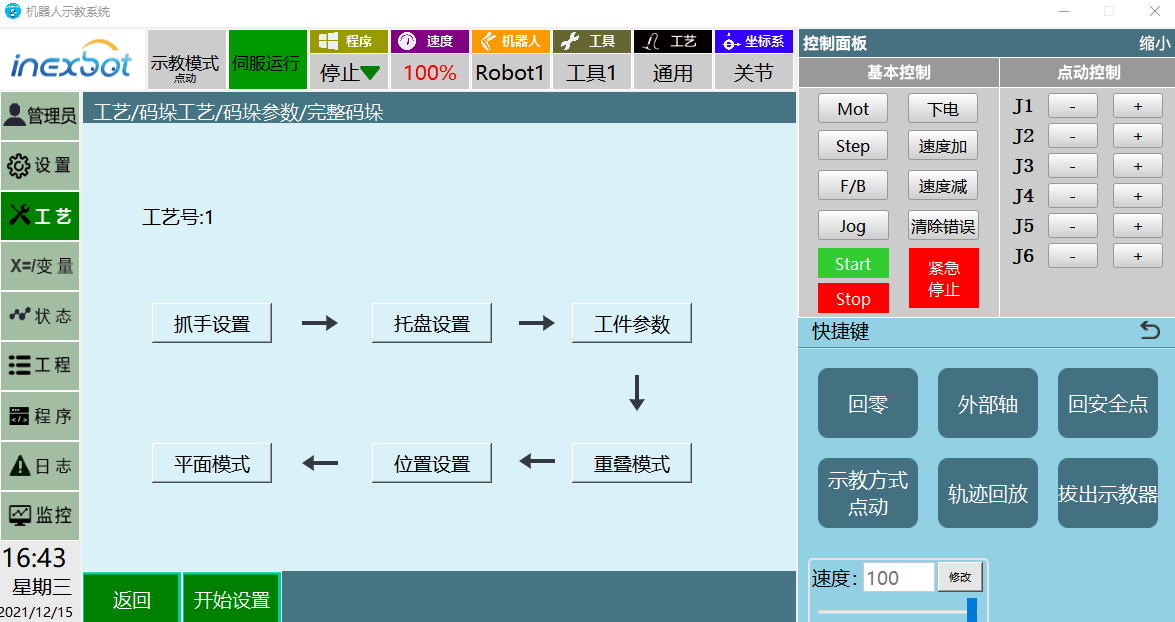
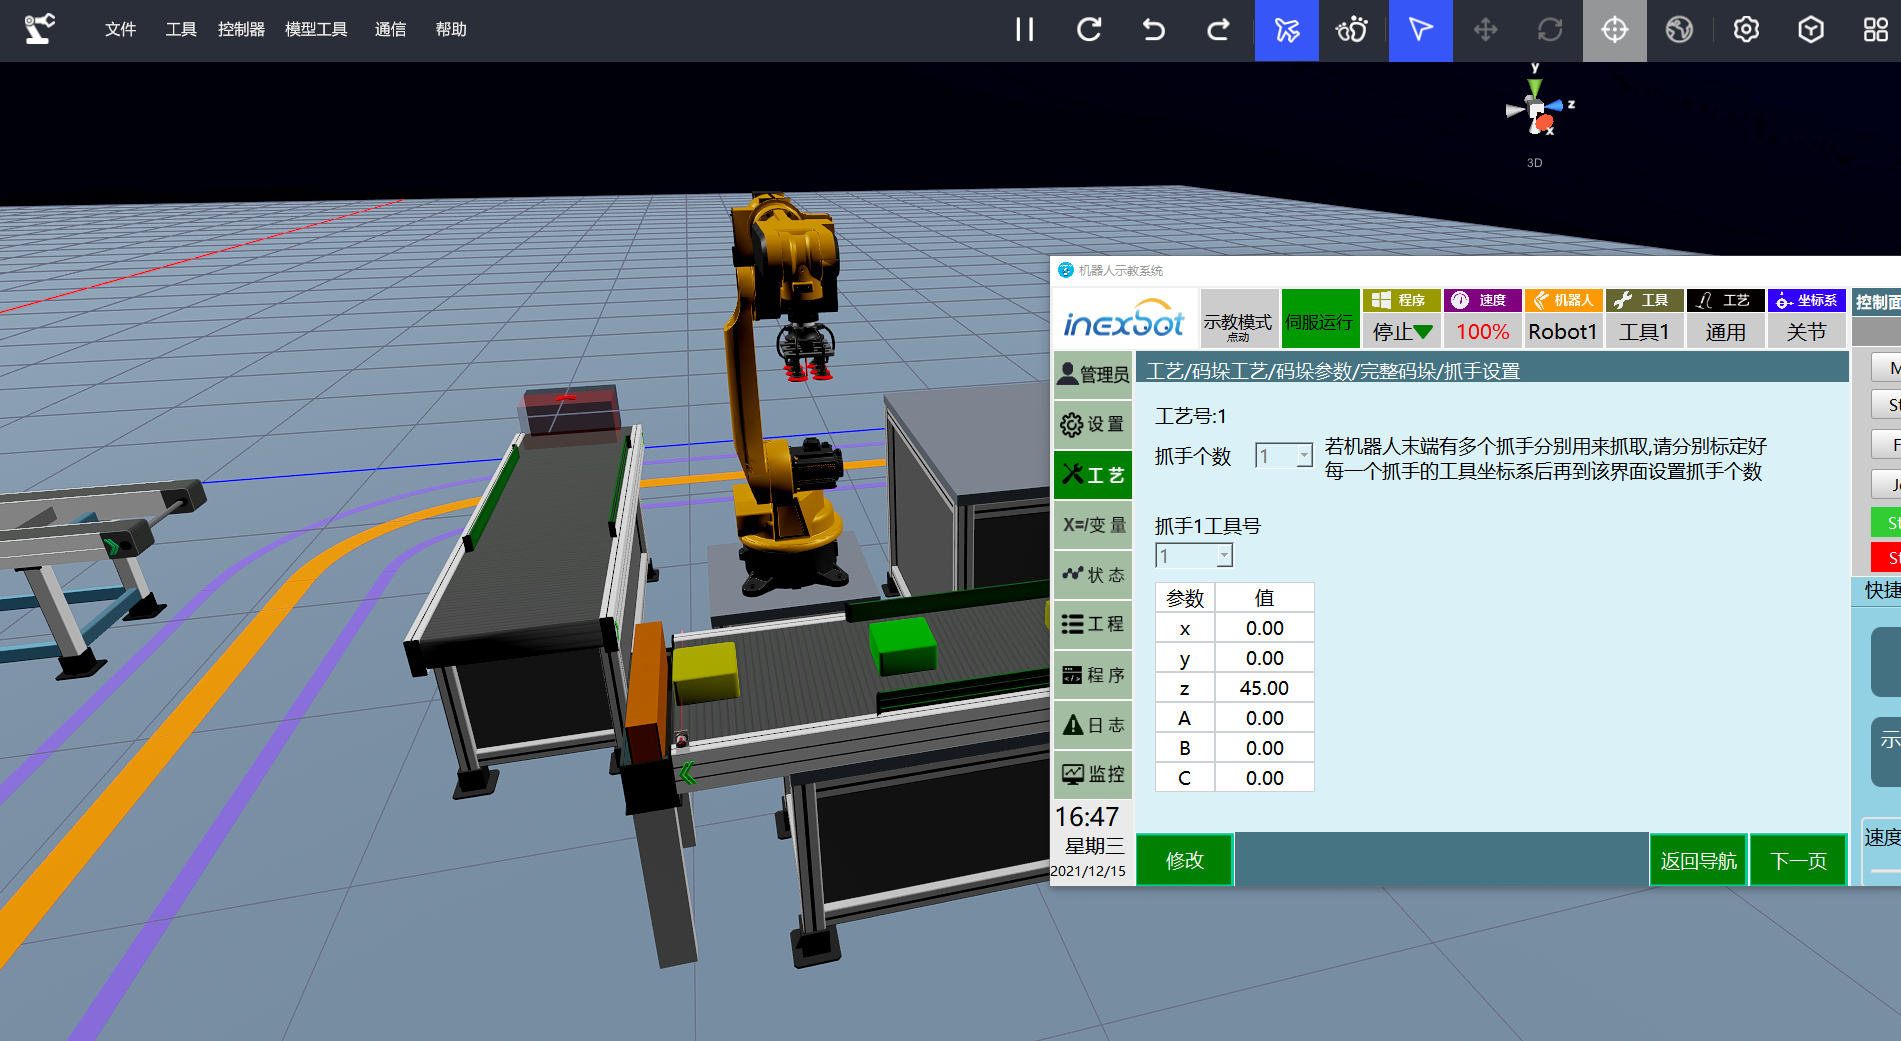
After setting up the tool, next set where the stacked workpieces will be placed (the user coordinate system). This interface also has multiple buttons divided into three modules: mark this point, move to this point, calculate; here the X direction and Y direction only represent directions.
Mark the pallet origin → mark the pallet X direction → run to the pallet origin → mark the pallet Y direction
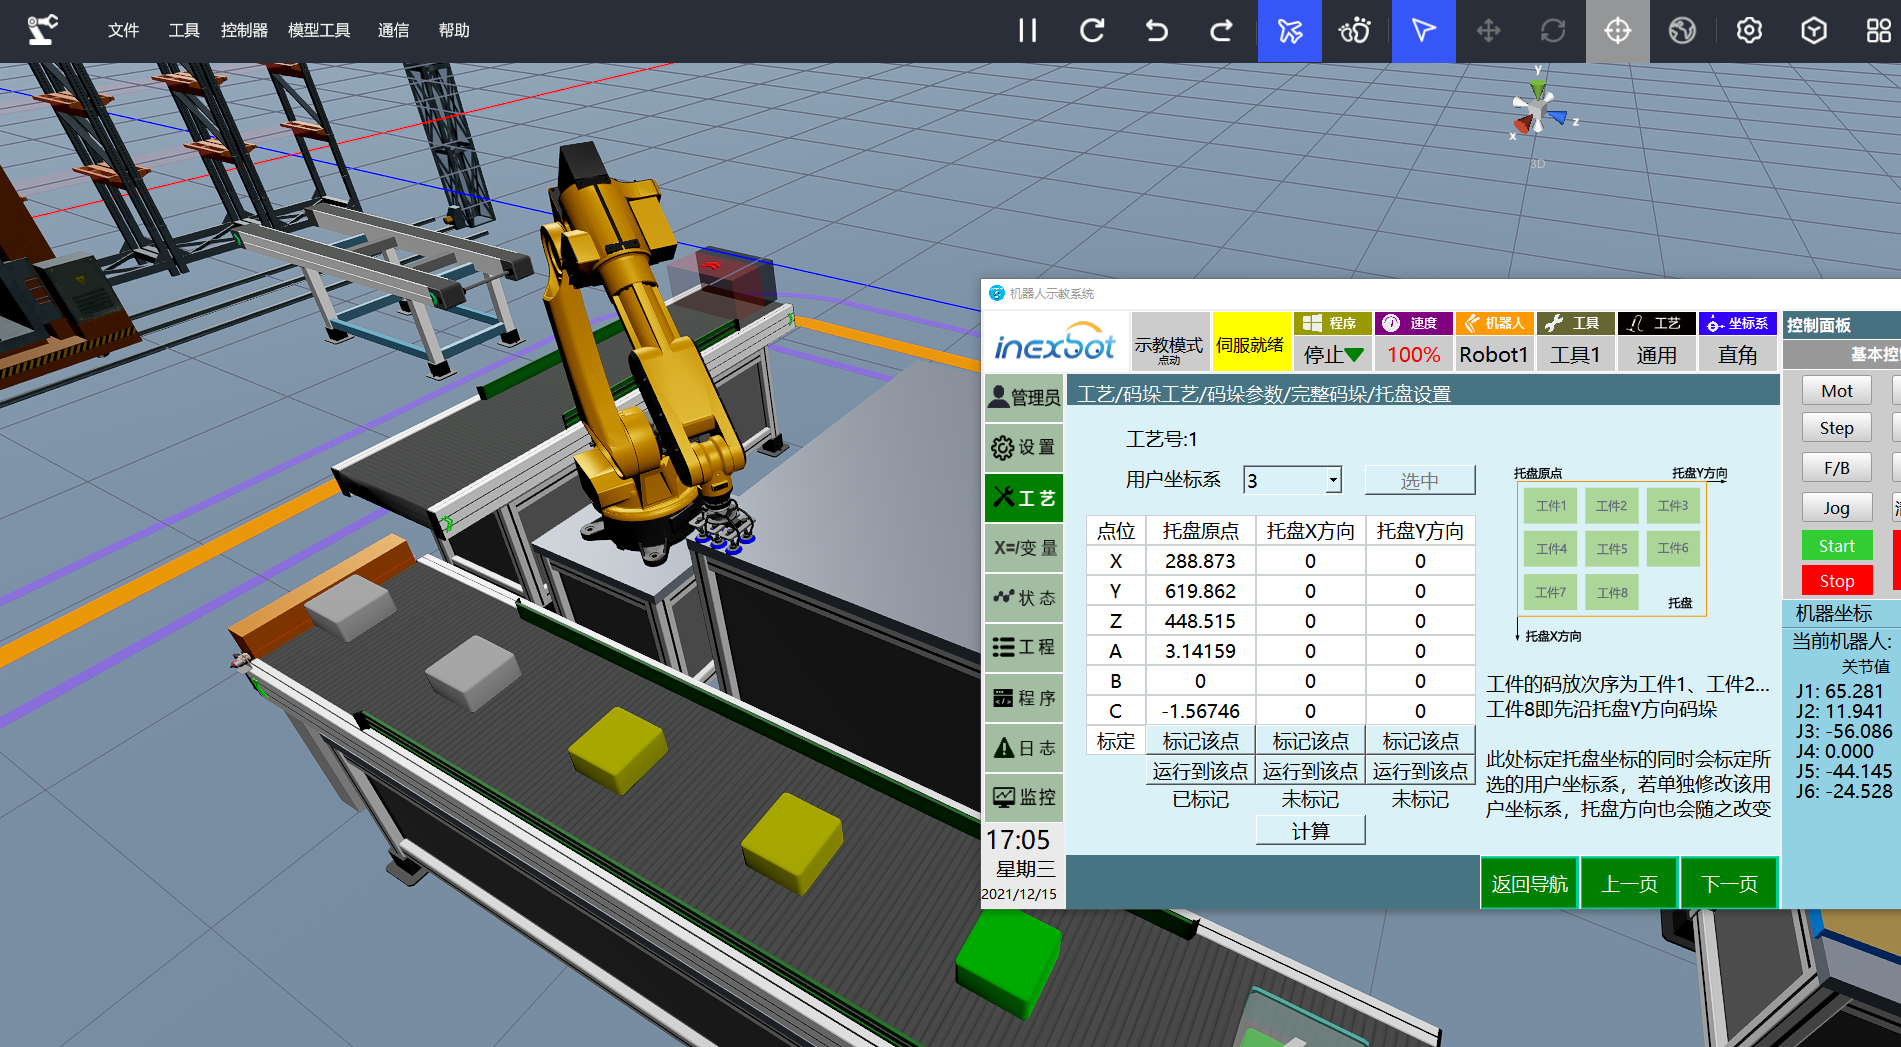
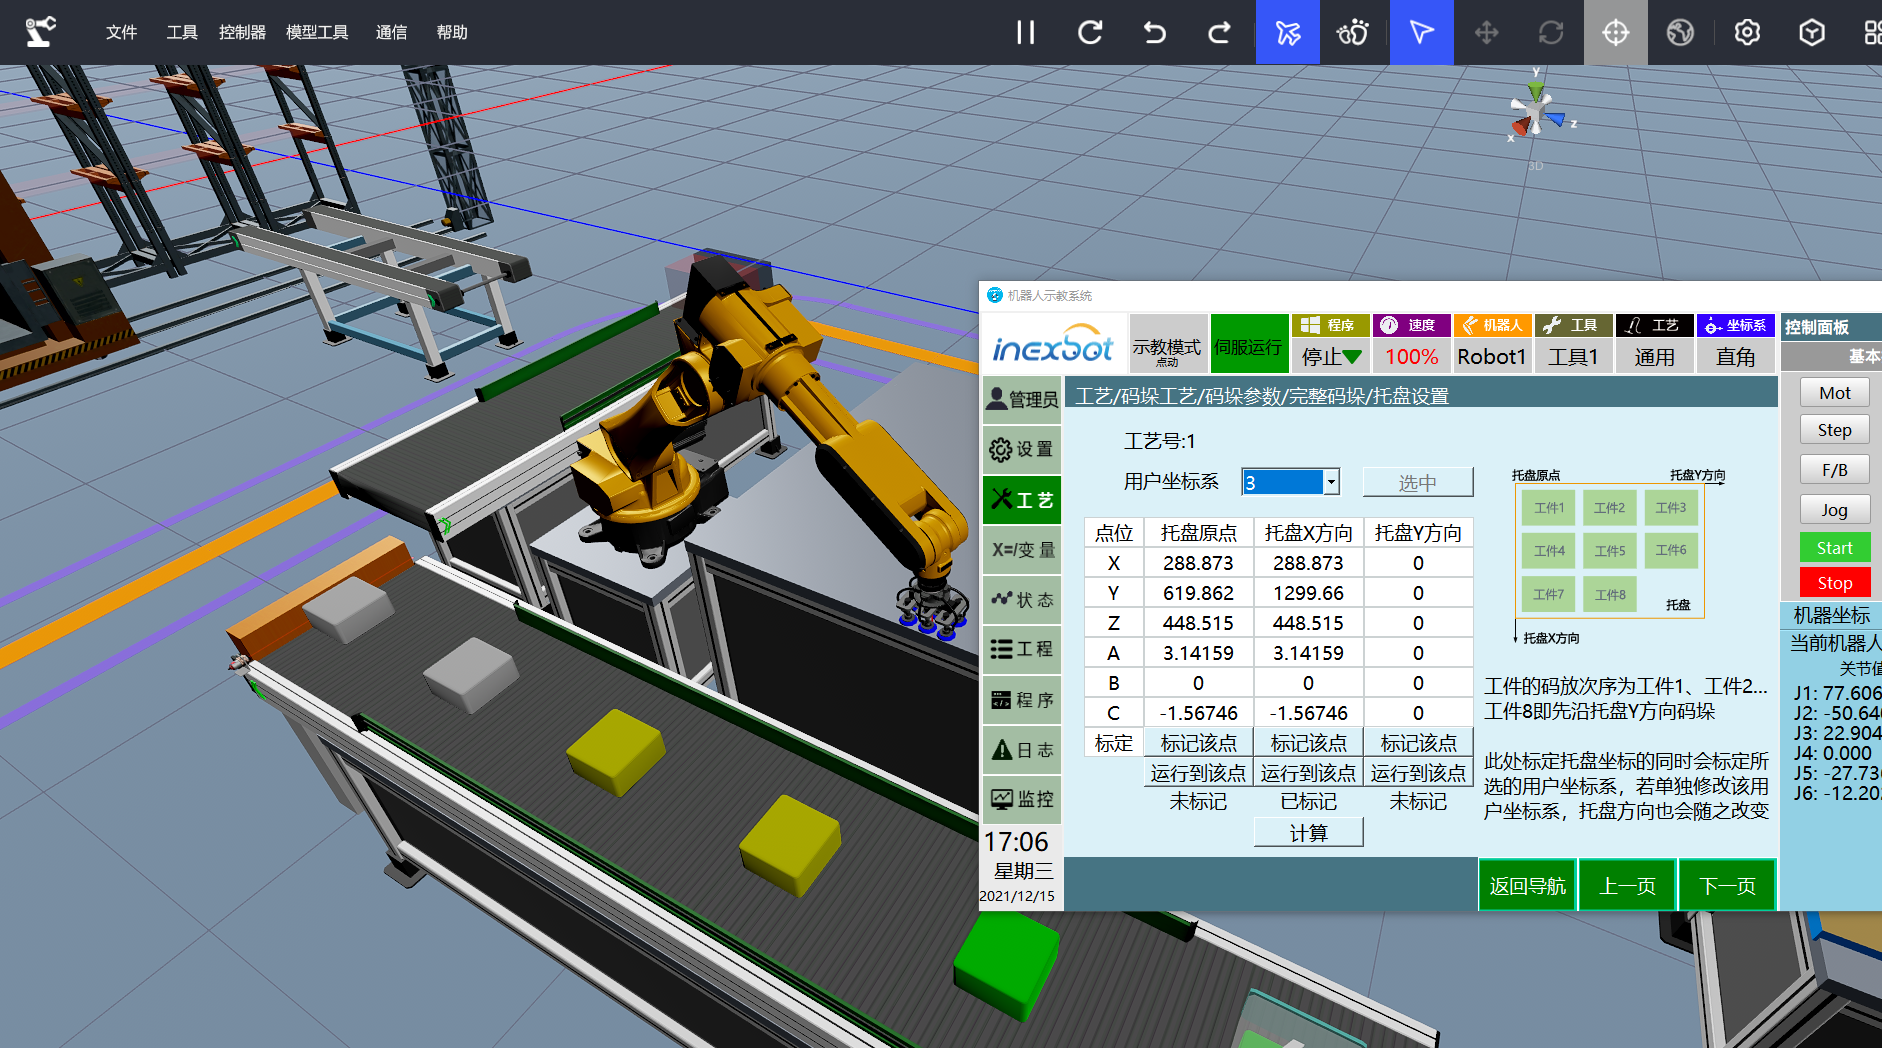
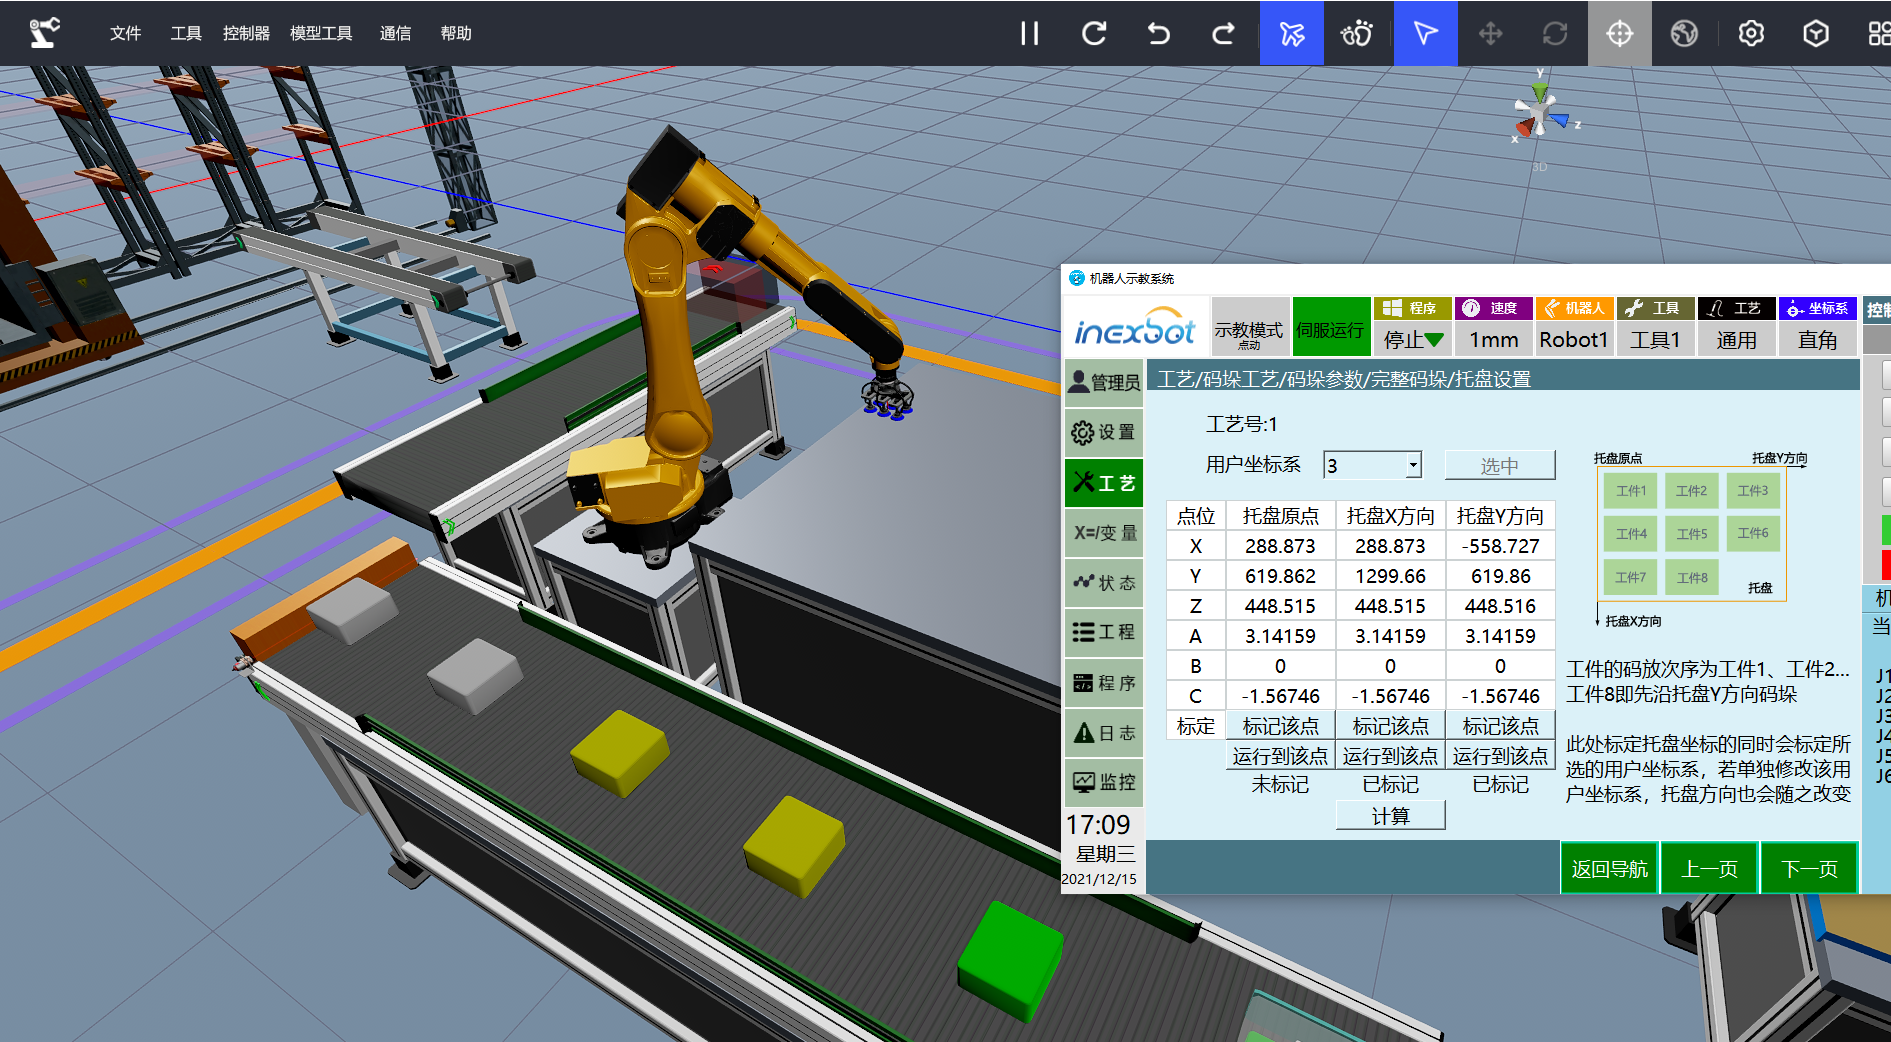
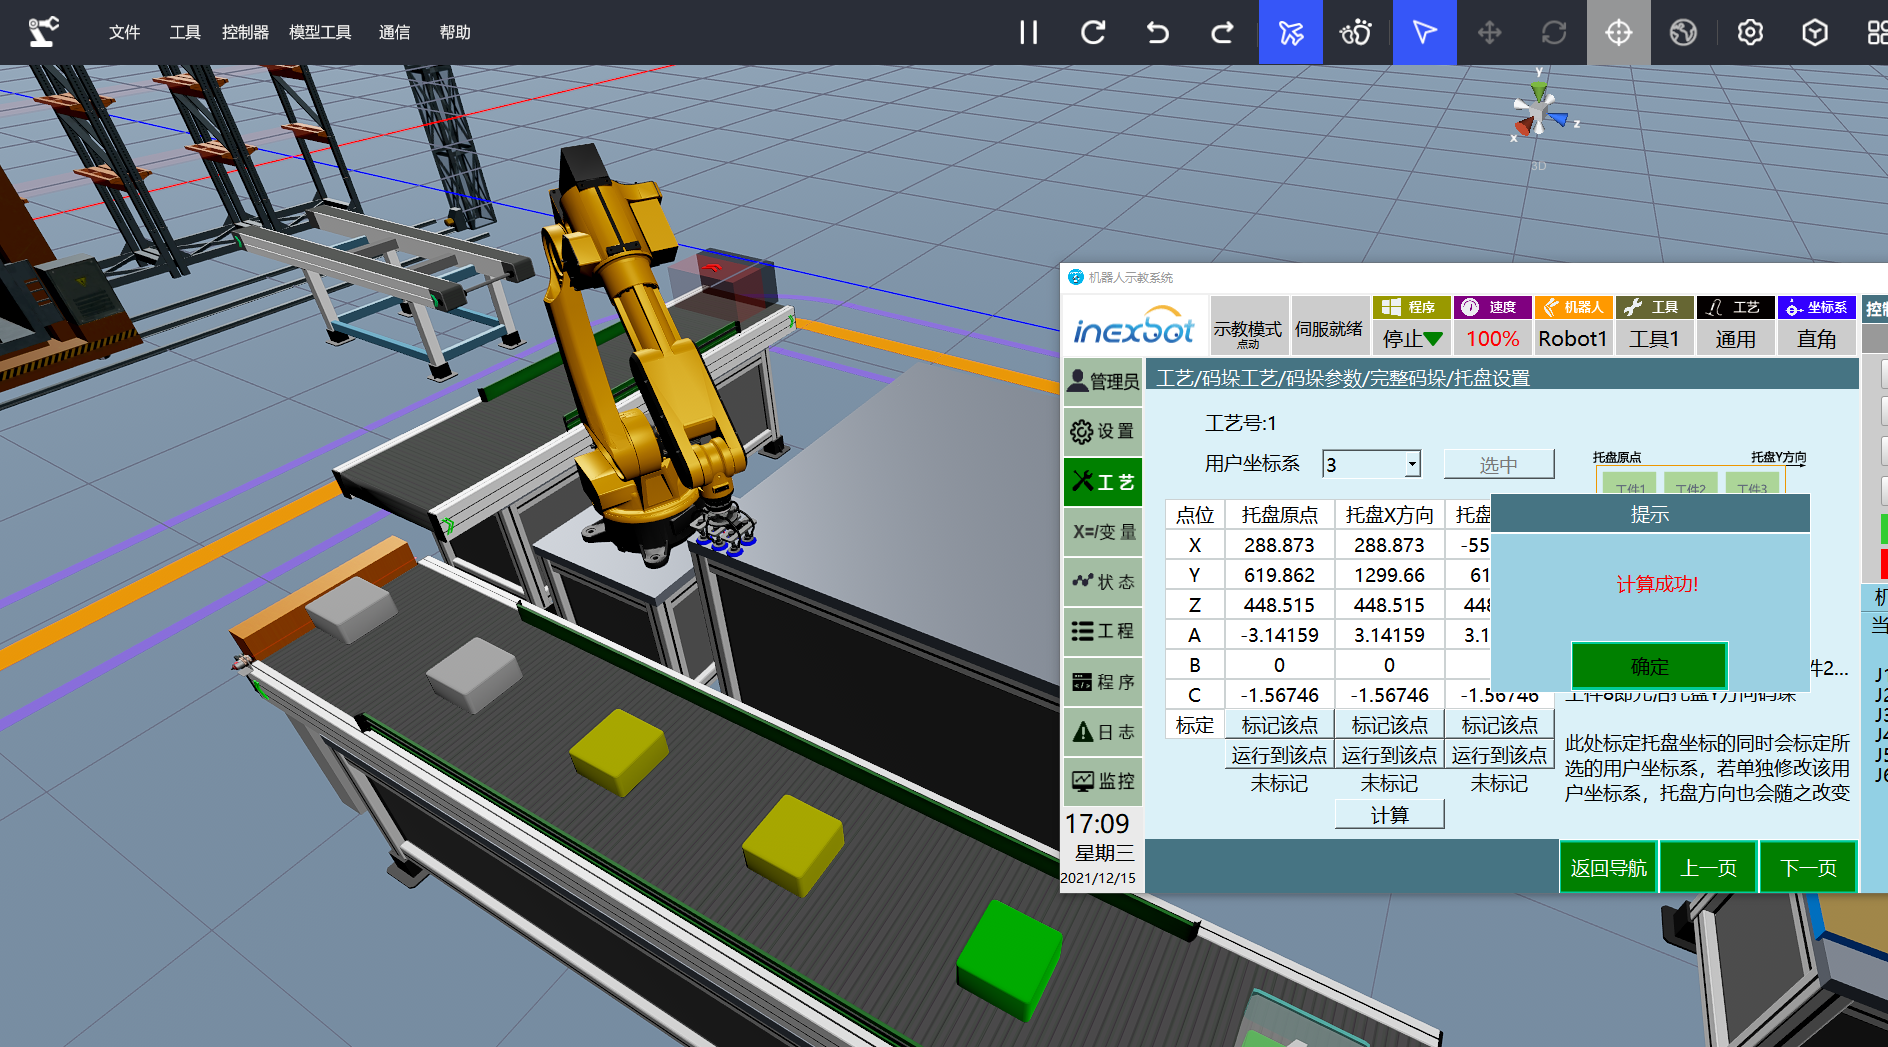
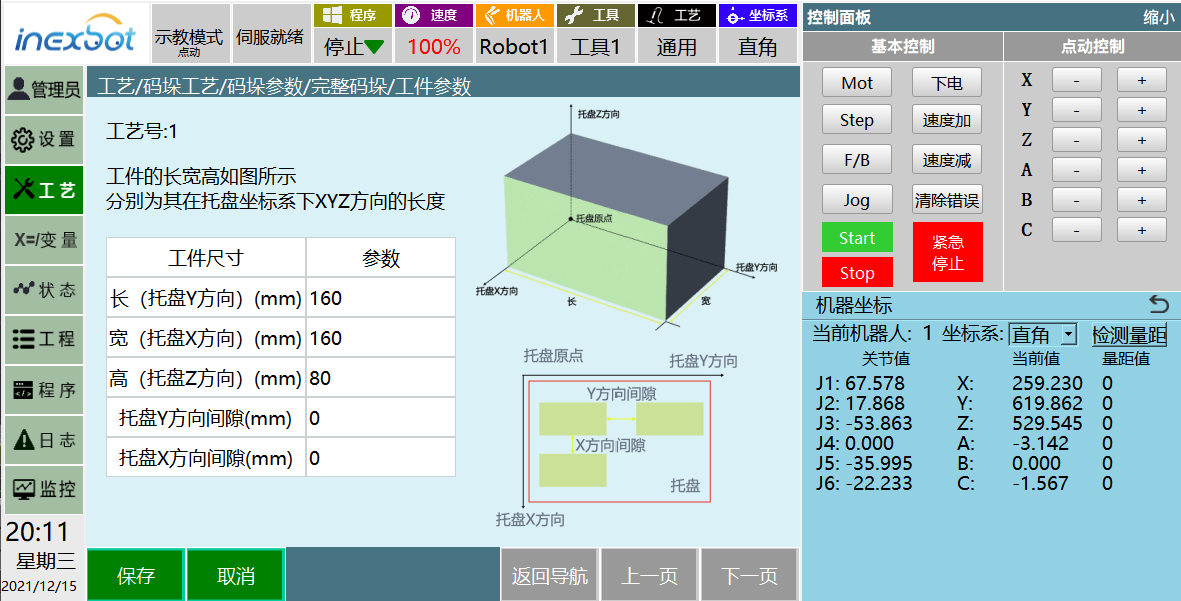
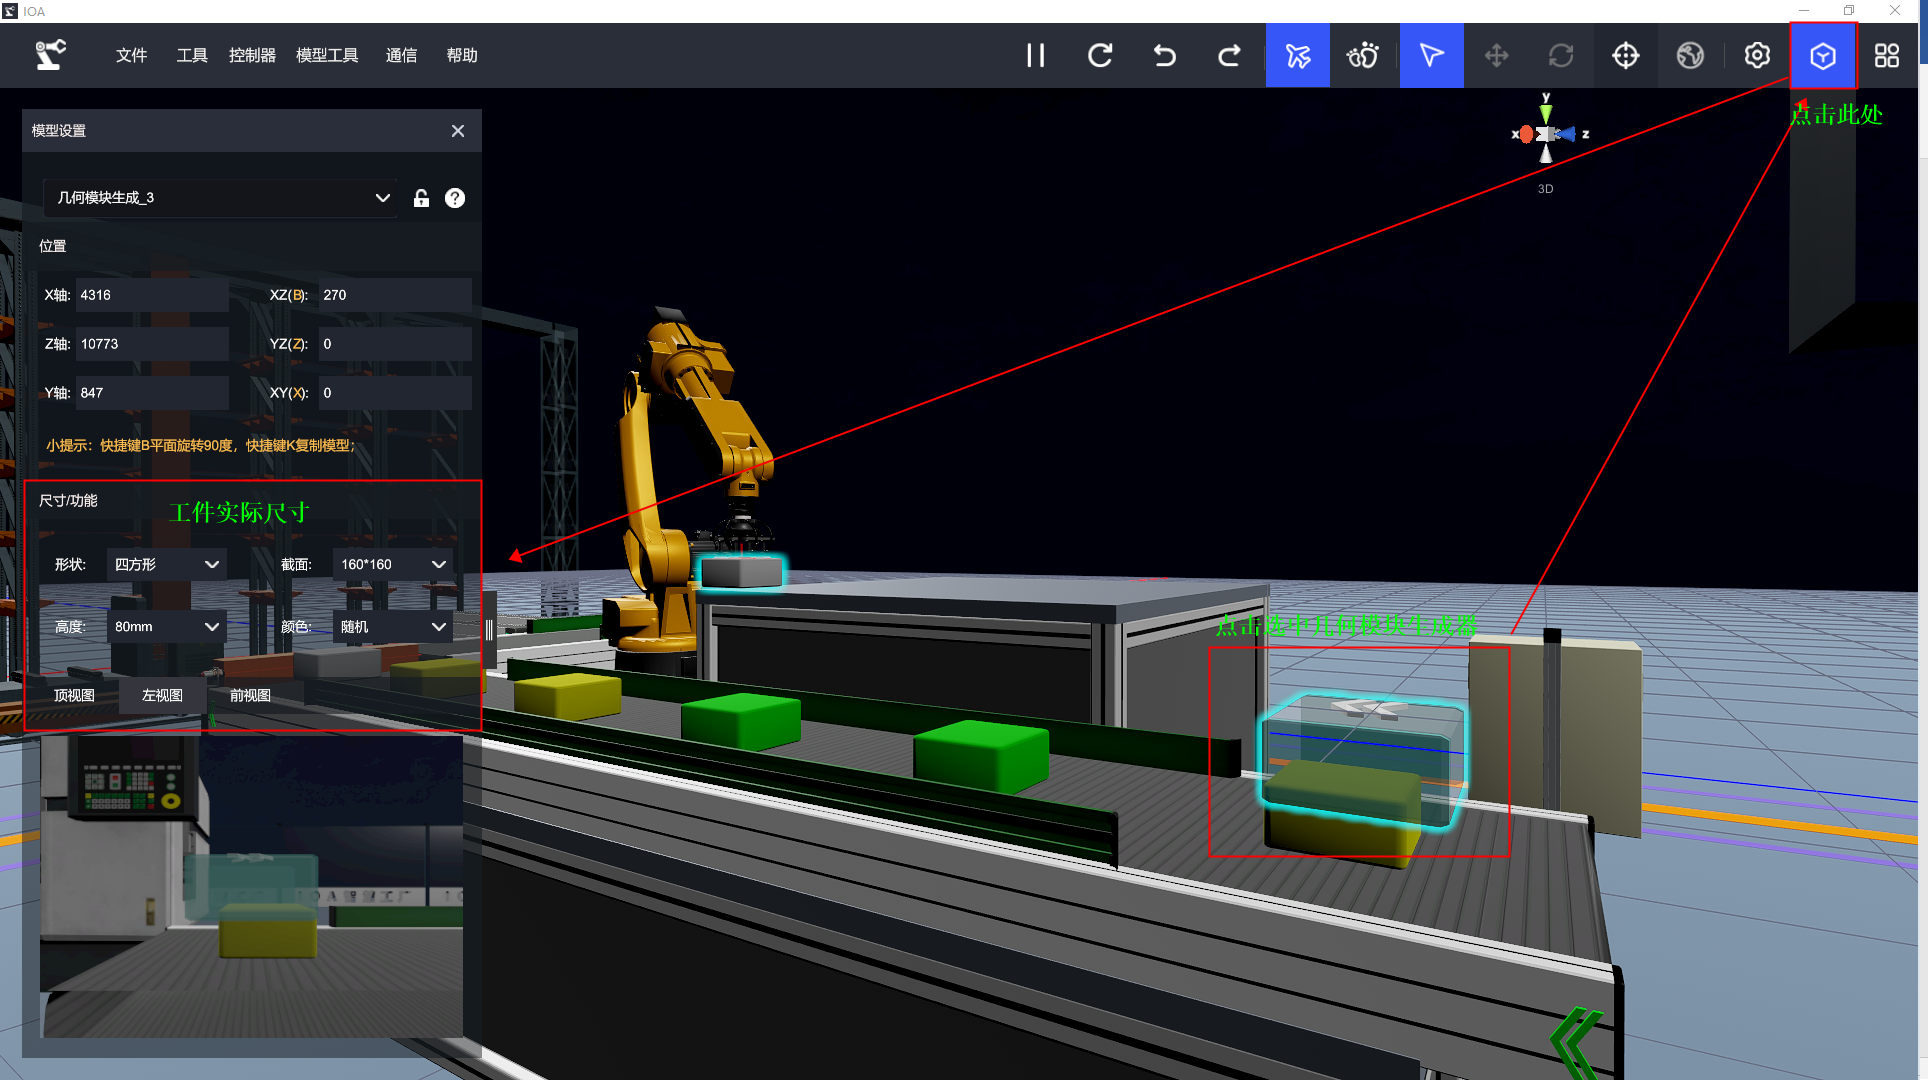
Next, set the workpiece dimensions; set them according to the actual workpiece, and in IOA simulation they must also be set to the displayed actual size. Here the workpiece size is 16016080, with workpiece gaps of X=0, Y=0.
Click 【Next Page】to enter the layer mode; the parameters involved here are: number of layers, repeat relation.
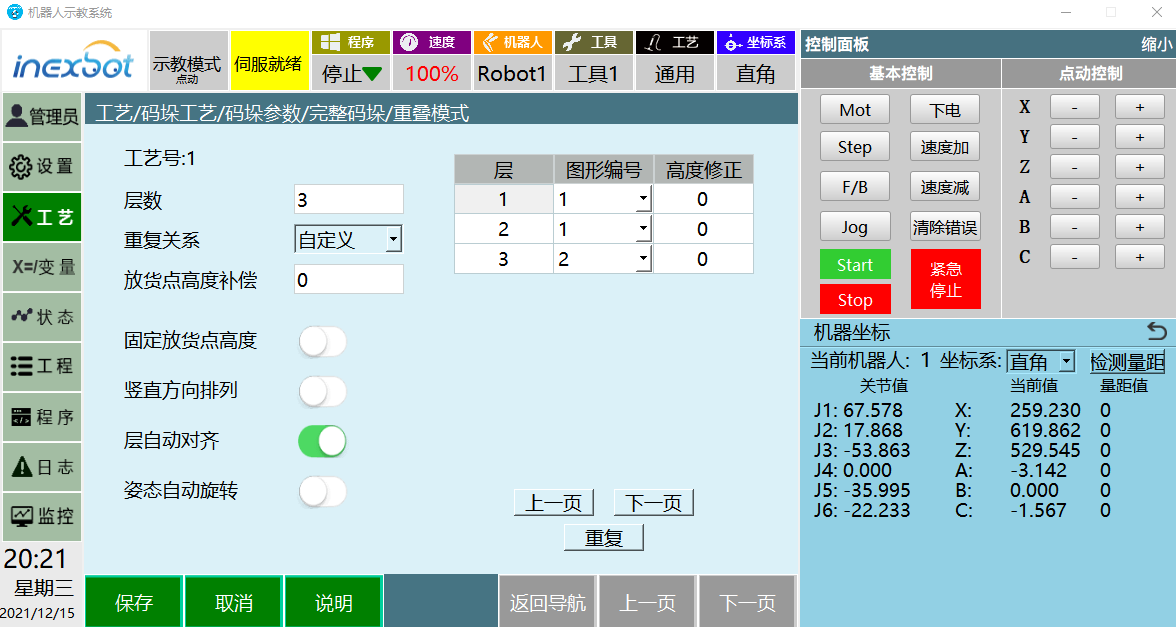
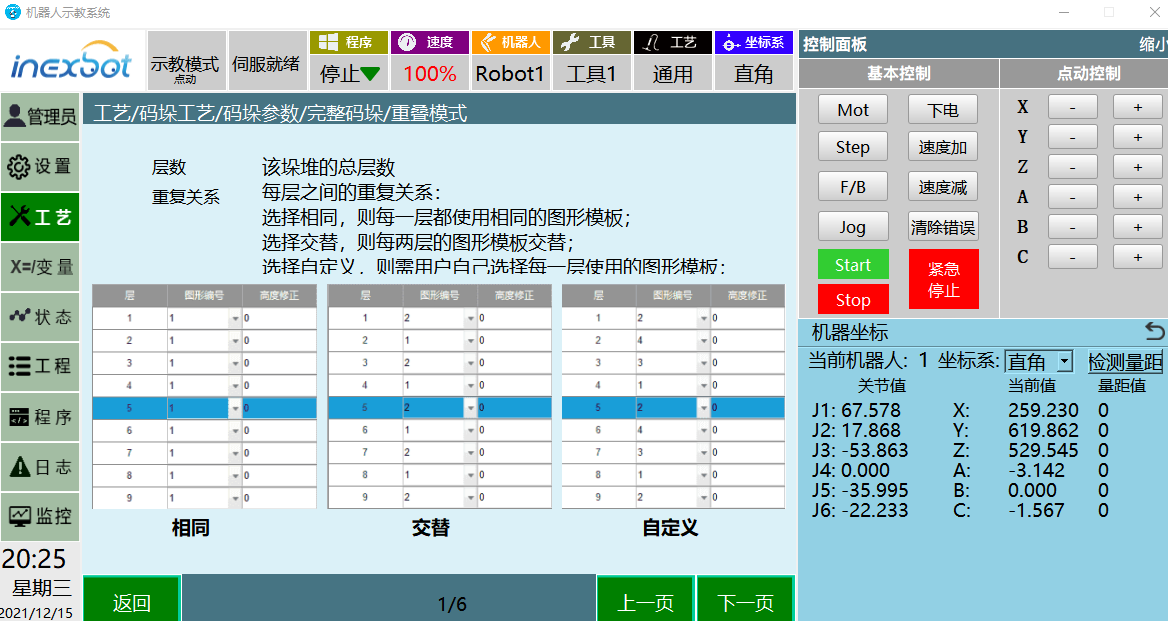
Set the number of layers to three and select "custom" for the repeat relation. Change the pattern number of the third layer to 2.
Number of layers: indicates how many layers are actually palletized; here only three layers are stacked;
Repeat relation: divided into same, alternate, custom;
Pattern number: bound to the pattern number when setting the palletizing pattern later; here the pattern number is bound to the layer.
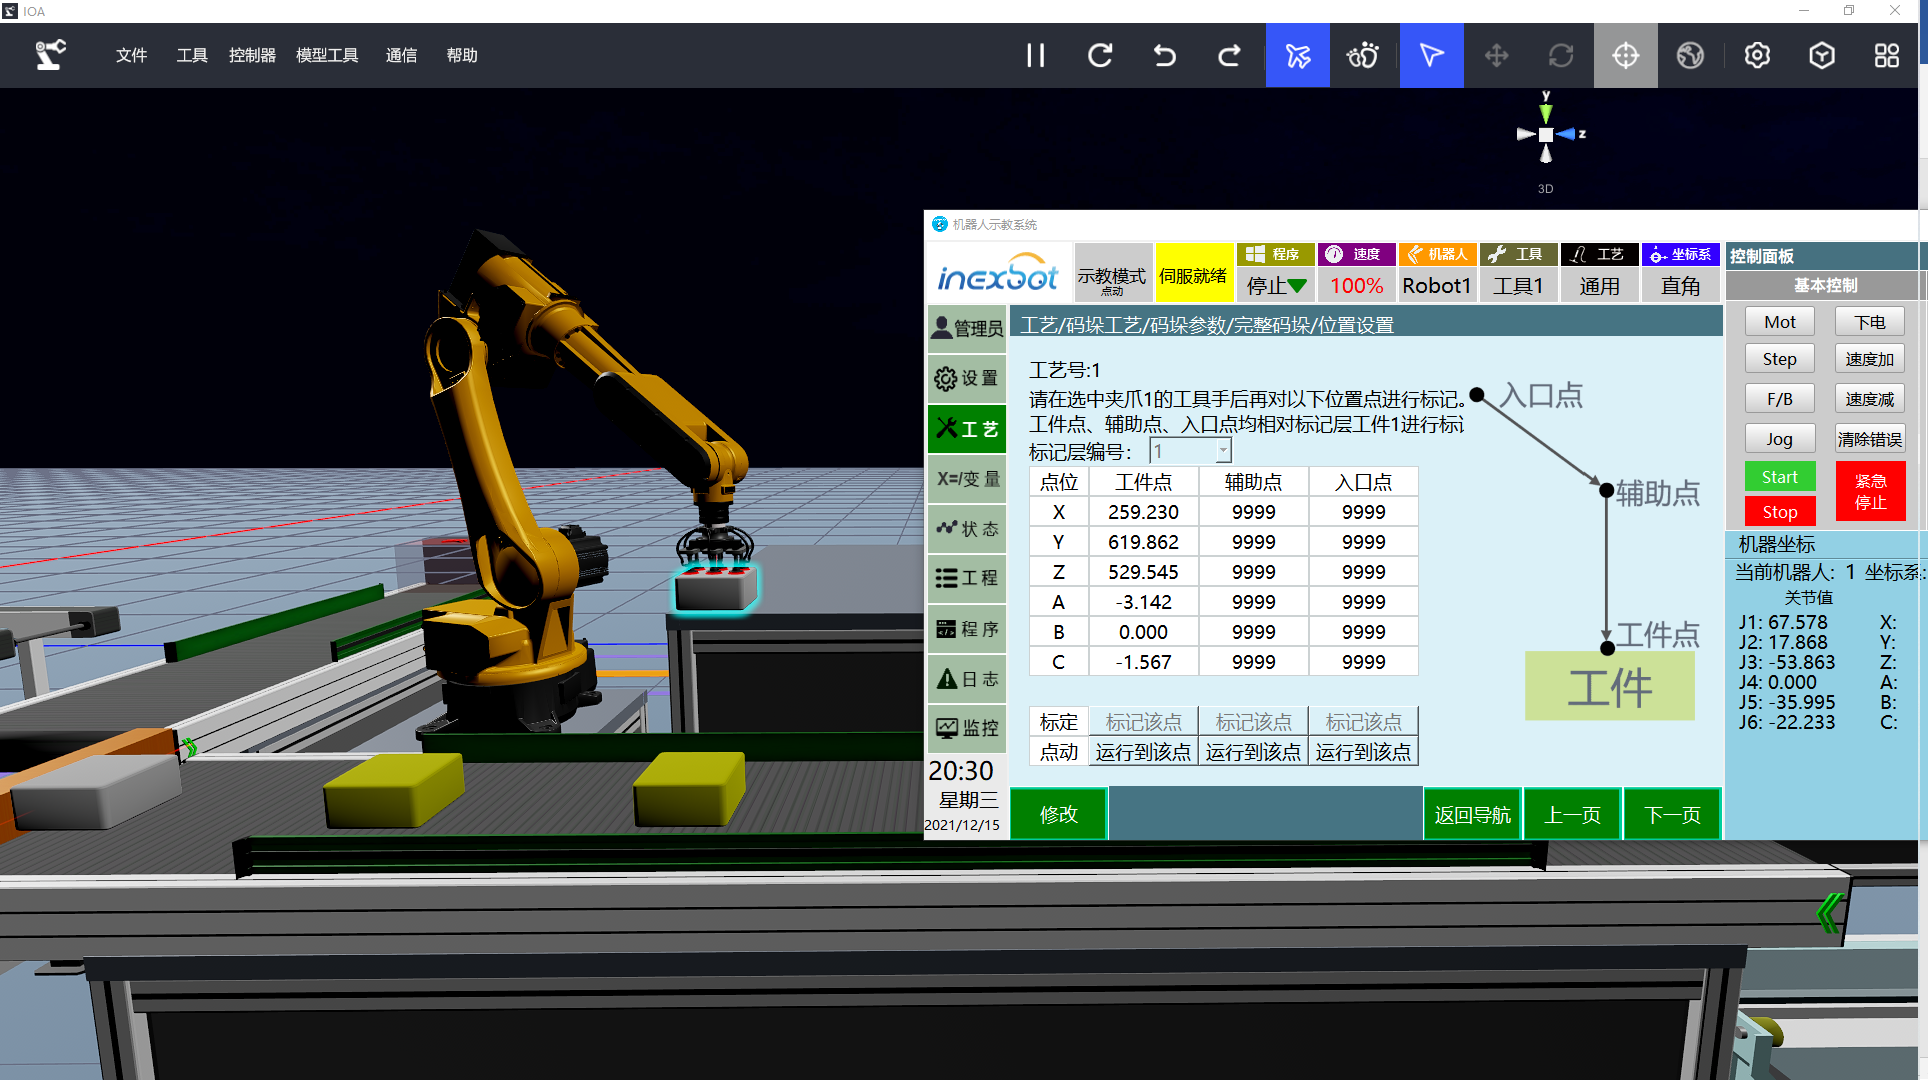
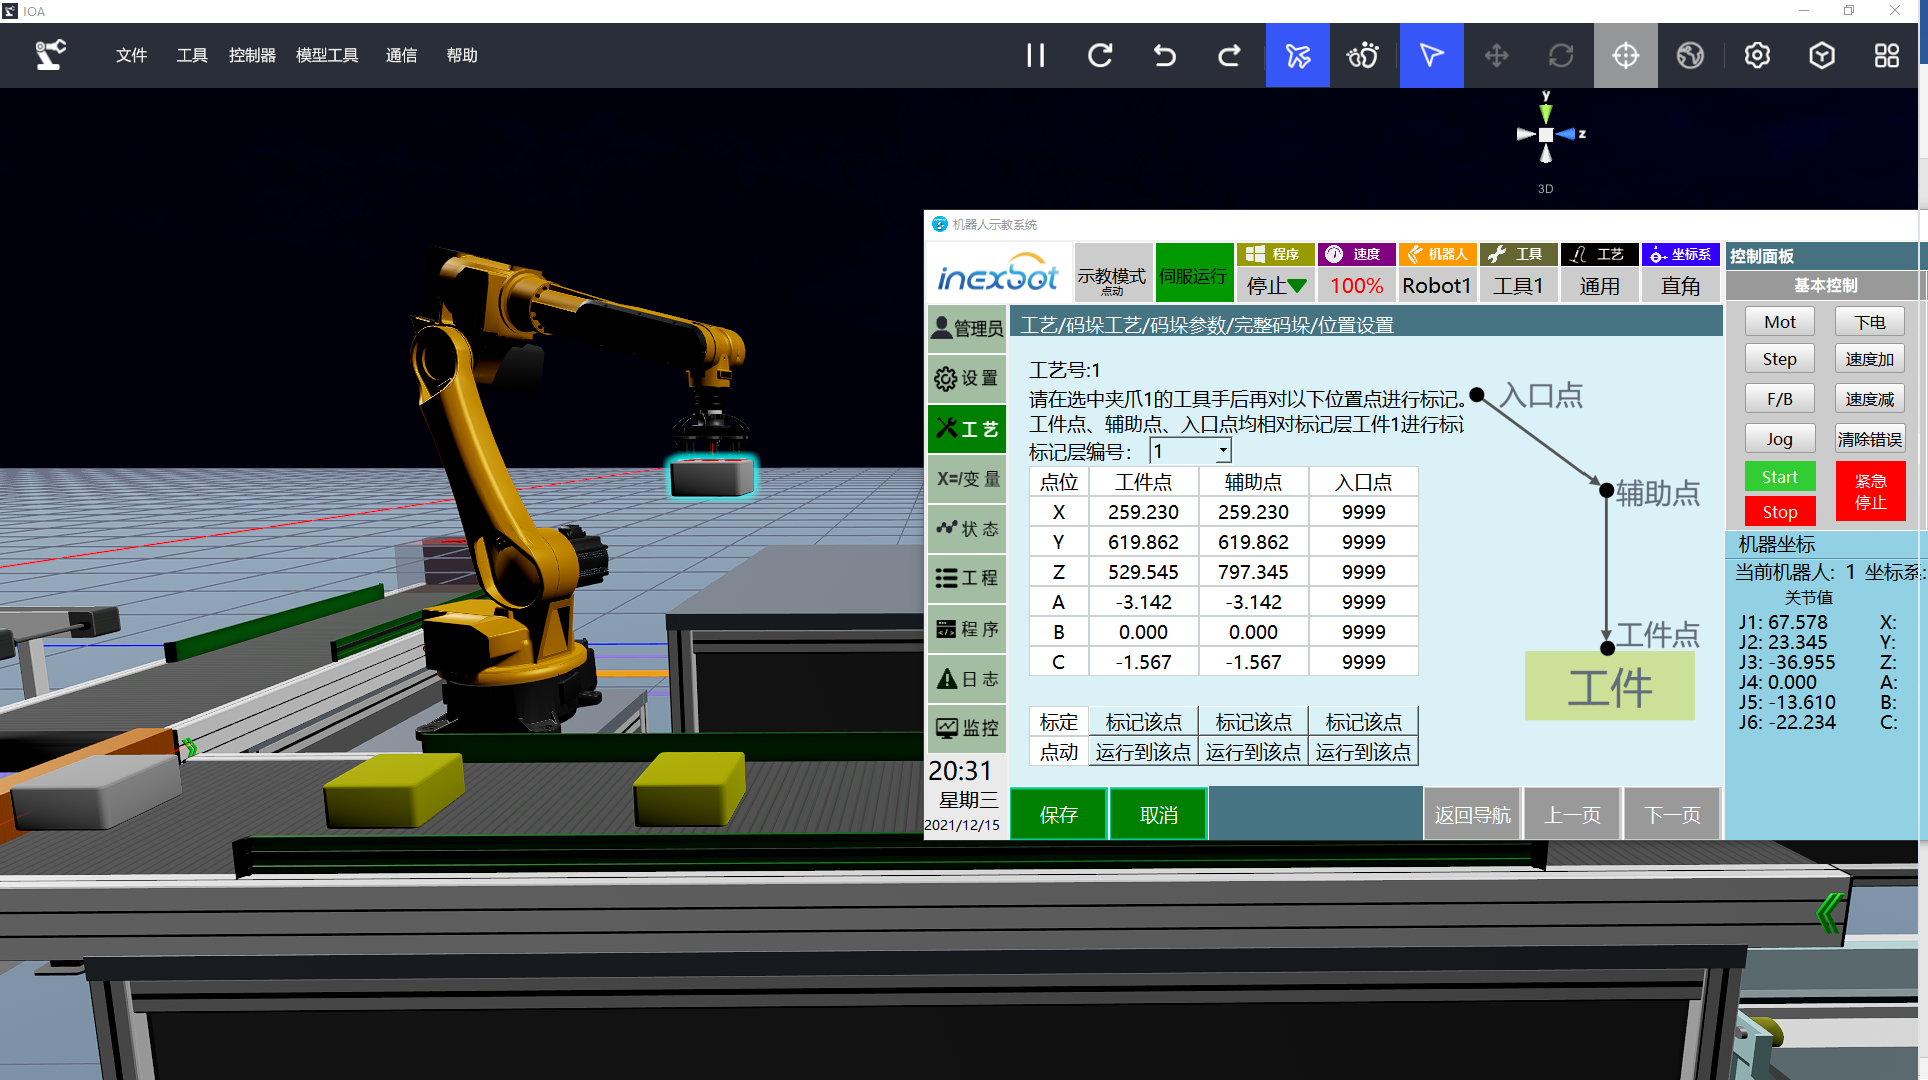
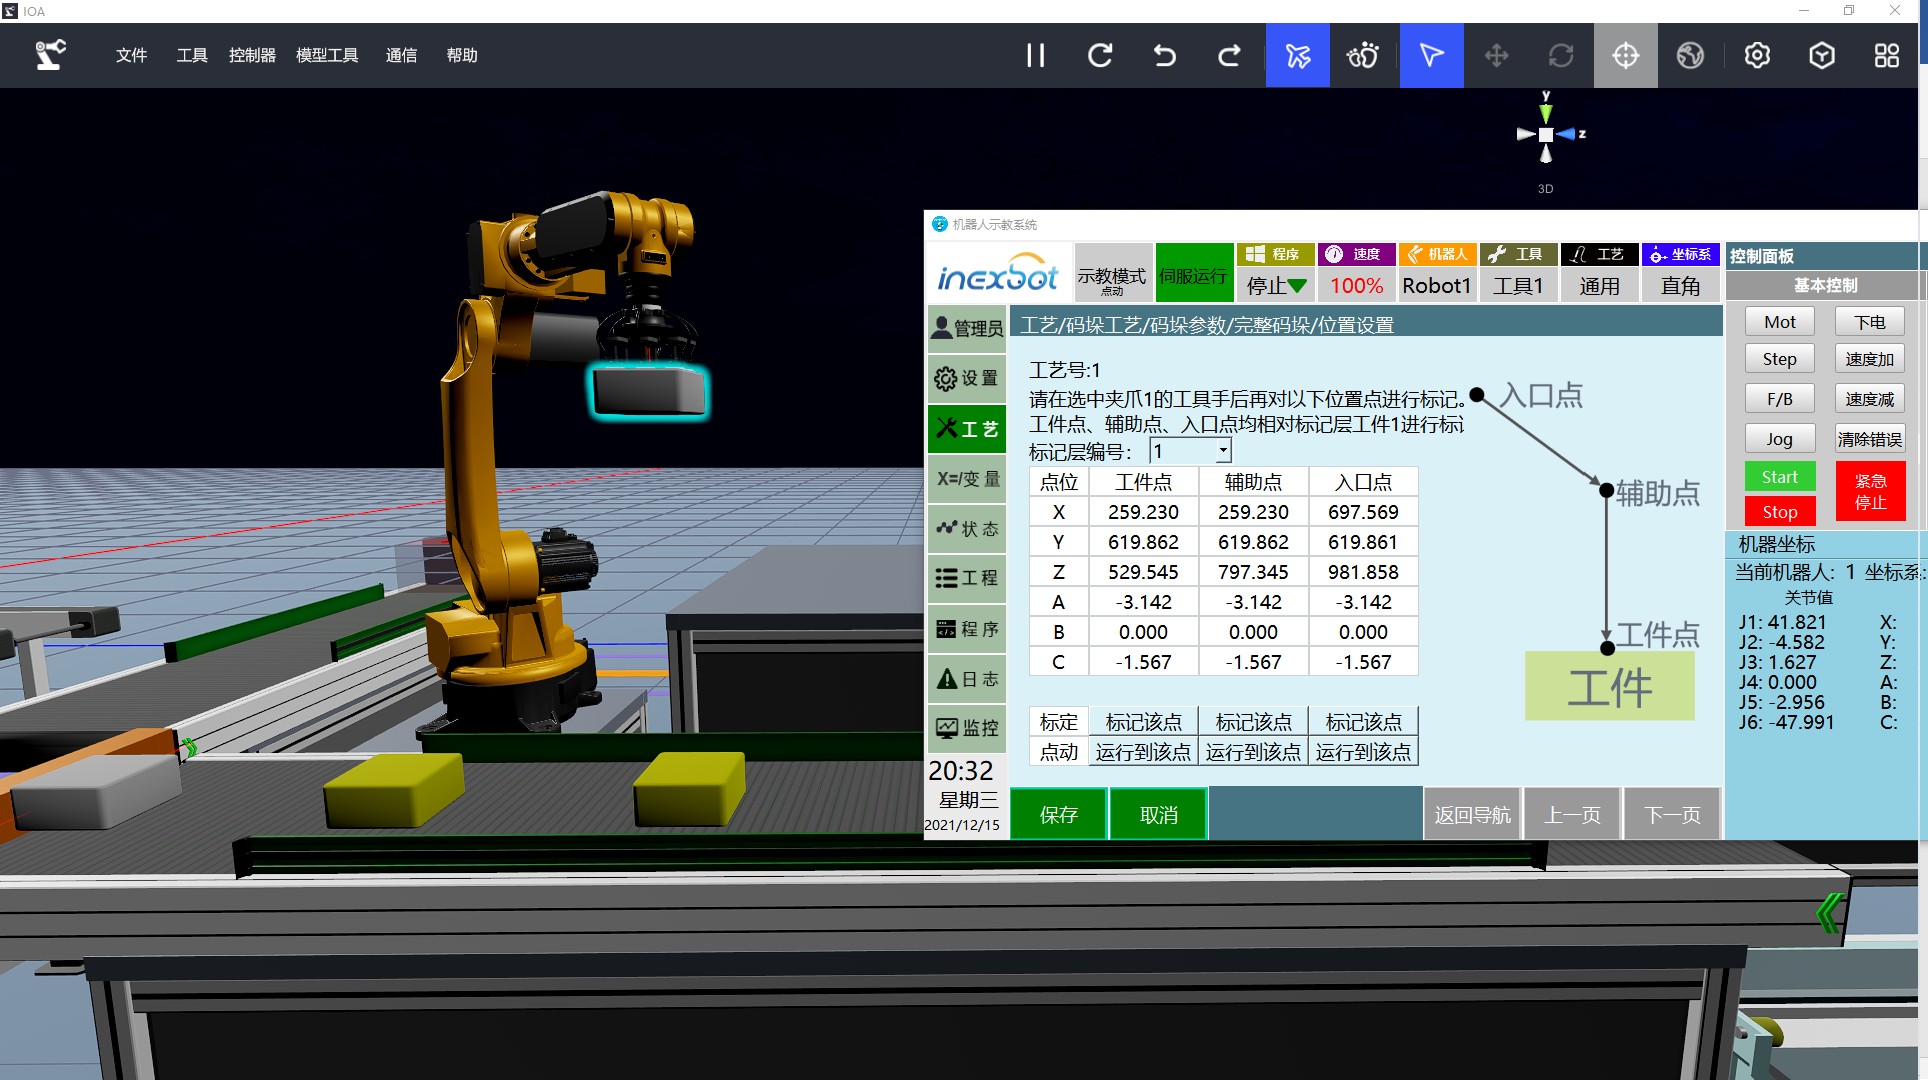
With the workpiece dimensions set, start setting where the first workpiece is actually placed in the user coordinate system, including the workpiece point, auxiliary point and entry point. When calibrating the workpiece point, the workpiece is included; all calibration here is based on workpiece 1.
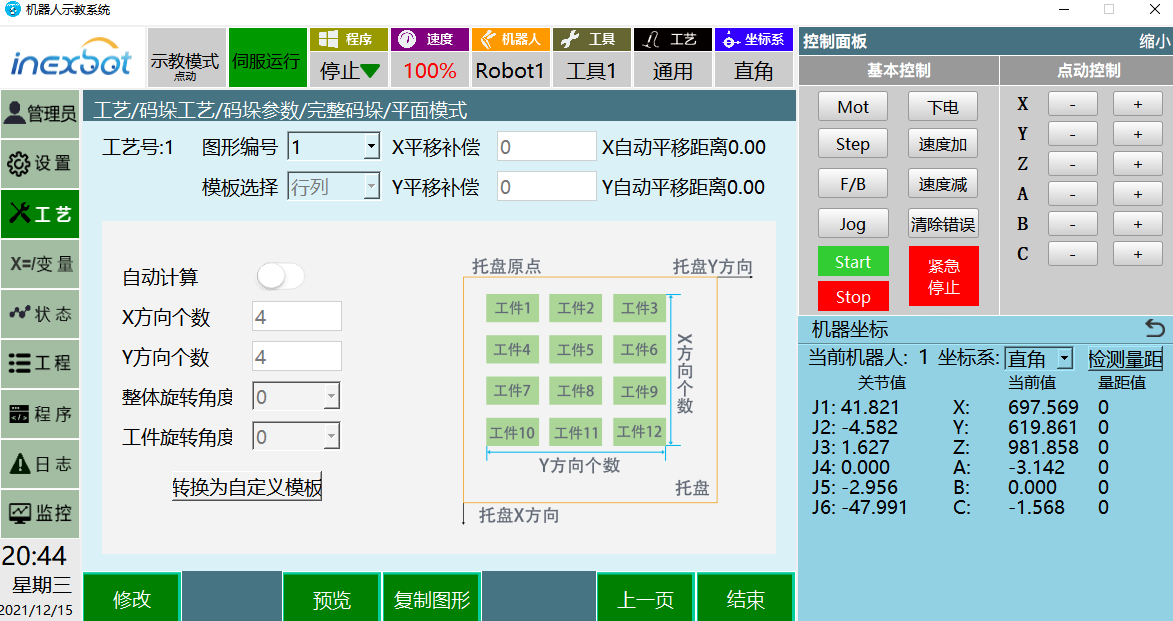
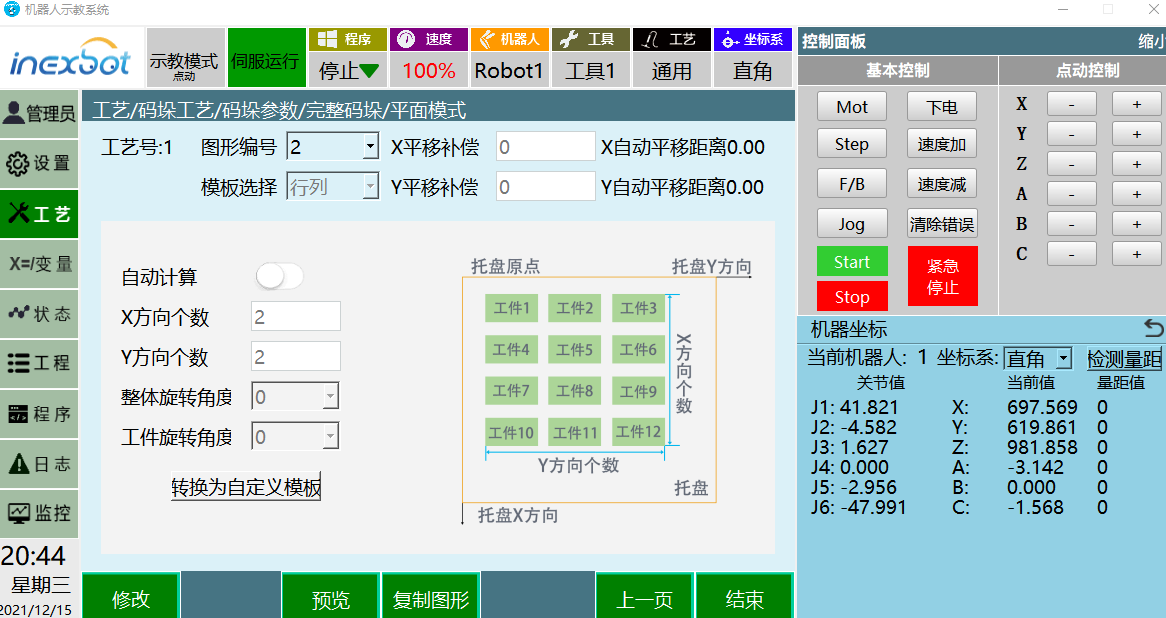
Click 【Next Page】to enter the pattern mode. Our palletizing patterns are quite varied: row/column mode, interlocking, square-shaped, five-workpiece flower, custom, etc., to meet all kinds of needs. Here we set the commonly used row/column mode. As mentioned earlier, each layer has a repeat relation: the first and second layers are bound to pattern number 1, and the third layer is bound to pattern number 2. Pattern number 1 is set to 44 rows/columns, and pattern number 2 is set to 22 rows/columns.
The IOA simulation platform configuration files and the iNexBot system job and configuration files used in this article can be click to download
At this point, our palletizing module setup is basically complete; all that remains is automatic program generation. In the next chapter, we'll introduce palletizing commands and automatic job file generation.