
PC Secondary Development - Continuous Motion Mode
2022-01-19
The continuous motion mode in PC secondary development is a motion mode that can break free from instruction-based operation. It allows direct control of the robot for continuous motion, without relying on job programs.
Environment Setup
Create a new project
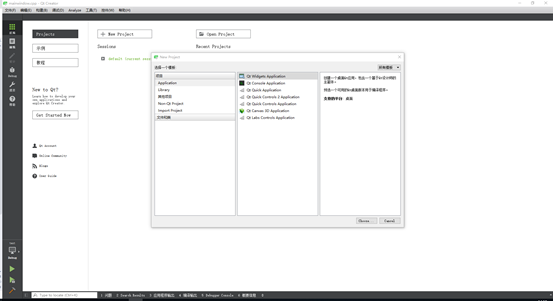
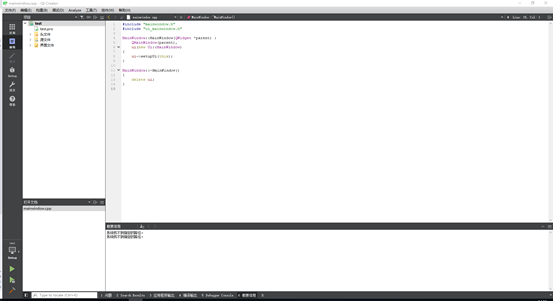
Project creation is completed
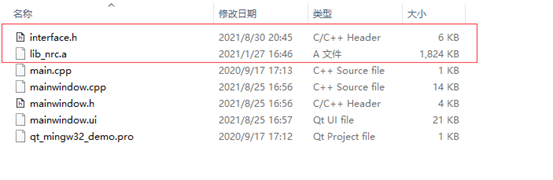
Place the library file lib_nrc.a and interface.h file downloaded from the official website into the project directory
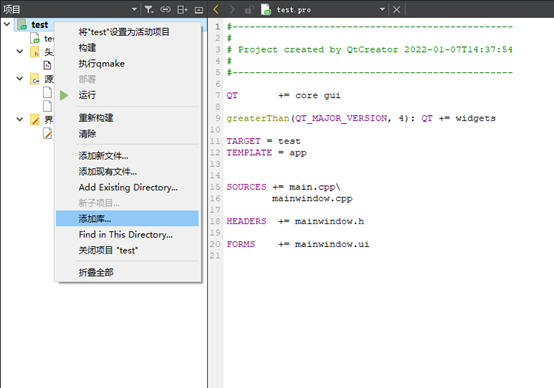
Right-click on the project and select "Add Library..."
Select "External Library"
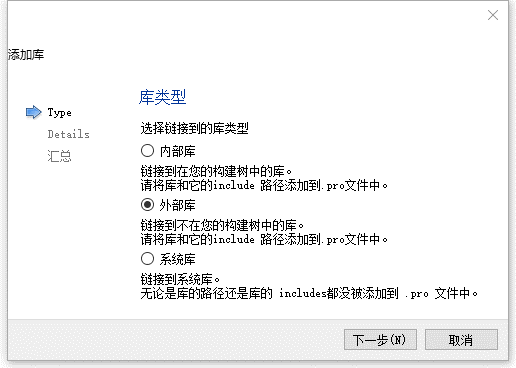
Choose the library file that was placed in the same directory, then check "Windows" and "Static"
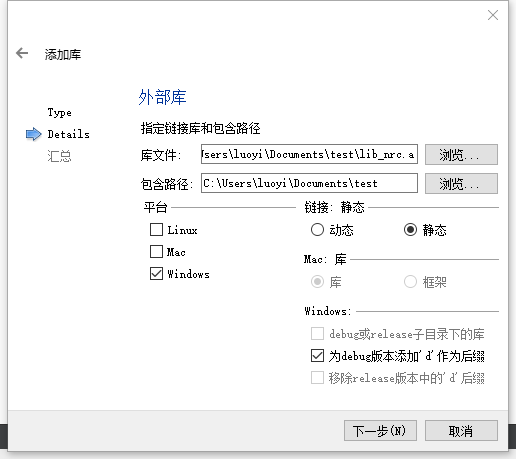
Click "Finish" to successfully add the static library
If there is no network in the .pro file, it needs to be manually added

Development
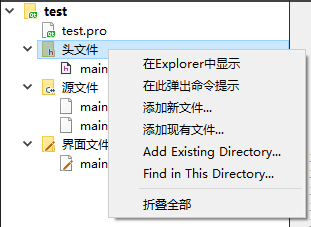
Right-click on the header file and select "Add Existing File...". Choose the "interface.h" file and click "Open".
Add #include "interface.h" in mainwindow.cpp
#include "mainwindow.h"
#include "ui_mainwindow.h"
#include "interface.h"
Select the UI interface and add three buttons

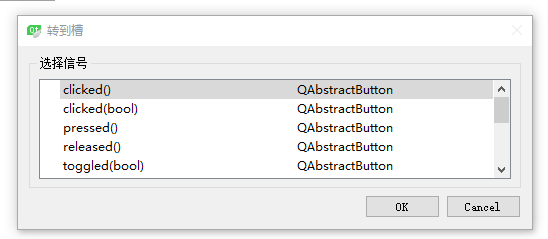
Right-click on each button and select "Go to slot..."
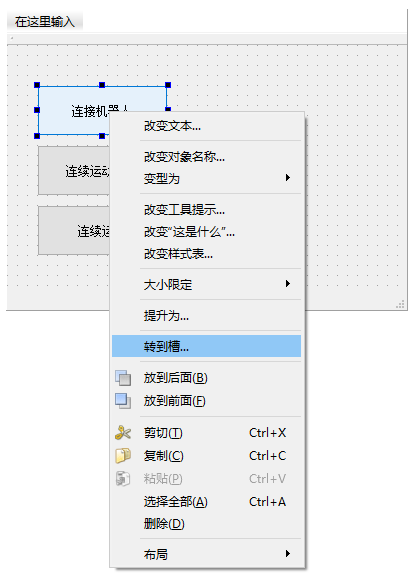
Choose the "clicked()" signal and click "OK"
In the slot function of the first button, add the robot connection interface
void MainWindow::on_pushButton_clicked()
{
    char ip[100] = "192.168.1.13";
    if(connect_robot(ip))
    {
        qDebug()<<"Connection successful";
    }
    else
    {
        qDebug()<<"Connection failed";
    }
}
Use the connect_robot(char \*ip) interface to connect to the desired controller's IP address
Continuous Motion Mode
In the slot function of the second button, add the interface to enable the continuous motion mode
void MainWindow::on_pushButton_2_clicked()
{
    if(get_current_mode() != 2)
    {
        set_current_mode(2);
    }
    continuous_motion_mode(1);
}
Use the get_current_mode() interface to determine if the current mode is in "run" mode. If not, use the set_current_mode(2) interface to switch to "run" mode
Use the continuous_motion_mode(1) interface to enable the continuous motion mode
Use the get_current_mode() interface to get the current mode; 0: teach mode, 1: remote mode, 2: run mode
Use the set_current_mode(int num) interface to set the current mode; 0: teach mode, 1: remote mode, 2: run mode
Use the continuous_motion_mode(int num) interface to set the continuous motion mode; 0: off, 1: on
In the slot function of the third button, add the continuous motion instruction queue to be sent
void MainWindow::on_pushButton_3_clicked()
{
    //The following points are test points, use with caution!
    cmdPara cmd[6];

    cmd[0].cmdType = cmdPara::MOVJ;
    cmd[0].m_velocity = 30;
    cmd[0].m_acc = 30;
    cmd[0].m_dec = 30;
    cmd[0].m_pl = 0;

    cmd[0].m_coord[0] = 0;
    cmd[0].m_coord[1] = 0;
    cmd[0].m_coord[2] = 0;
    cmd[0].m_coord[3] = 0;
    cmd[0].m_coord[4] = 0;
    cmd[0].m_coord[5] = 0;
    cmd[0].m_coord[6] = 0;

    cmd[0].m_position[0] = 0;
    cmd[0].m_position[1] = 0;
    cmd[0].m_position[2] = 0;
    cmd[0].m_position[3] = 0;
    cmd[0].m_position[4] = 0;
    cmd[0].m_position[5] = 0;


    cmd[1].cmdType = cmdPara::MOVL;
    cmd[1].m_velocity = 300;
    cmd[1].m_acc = 30;
    cmd[1].m_dec = 30;
    cmd[1].m_pl = 0;

    cmd[1].m_coord[0] = 0;
    cmd[1].m_coord[1] = 0;
    cmd[1].m_coord[2] = 0;
    cmd[1].m_coord[3] = 0;
    cmd[1].m_coord[4] = 0;
    cmd[1].m_coord[5] = 0;
    cmd[1].m_coord[6] = 0;

    cmd[1].m_position[0] = 10;
    cmd[1].m_position[1] = 10;
    cmd[1].m_position[2] = 10;
    cmd[1].m_position[3] = 10;
    cmd[1].m_position[4] = 10;
    cmd[1].m_position[5] = 10;


    cmd[2].cmdType = cmdPara::MOVC;
    cmd[2].m_velocity = 300;
    cmd[2].m_acc = 30;
    cmd[2].m_dec = 30;
    cmd[2].m_pl = 0;

    cmd[2].m_coord[0] = 0;
    cmd[2].m_coord[1] = 0;
    cmd[2].m_coord[2] = 0;
    cmd[2].m_coord[3] = 0;
    cmd[2].m_coord[4] = 0;
    cmd[2].m_coord[5] = 0;
    cmd[2].m_coord[6] = 0;

    cmd[2].m_position[0] = 20;
    cmd[2].m_position[1] = 20;
    cmd[2].m_position[2] = 0;
    cmd[2].m_position[3] = 0;
    cmd[2].m_position[4] = 0;
    cmd[2].m_position[5] = 0;


    cmd[3].cmdType = cmdPara::MOVC;
    cmd[3].m_velocity = 300;
    cmd[3].m_acc = 30;
    cmd[3].m_dec = 30;
    cmd[3].m_pl = 0;
    cmd[3].m_spin = 0;

    cmd[3].m_coord[0] = 0;
    cmd[3].m_coord[1] = 0;
    cmd[3].m_coord[2] = 0;
    cmd[3].m_coord[3] = 0;
    cmd[3].m_coord[4] = 0;
    cmd[3].m_coord[5] = 0;
    cmd[3].m_coord[6] = 0;

    cmd[3].m_position[0] = 0;
    cmd[3].m_position[1] = 0;
    cmd[3].m_position[2] = 0;
    cmd[3].m_position[3] = 0;
    cmd[3].m_position[4] = 0;
    cmd[3].m_position[5] = 0;


    cmd[4].cmdType = cmdPara::MOVCA;
    cmd[4].m_velocity = 300;
    cmd[4].m_acc = 30;
    cmd[4].m_dec = 30;
    cmd[4].m_pl = 0;
    cmd[4].m_spin = 0;

    cmd[4].m_coord[0] = 0;
    cmd[4].m_coord[1] = 0;
    cmd[4].m_coord[2] = 0;
    cmd[4].m_coord[3] = 0;
    cmd[4].m_coord[4] = 0;
    cmd[4].m_coord[5] = 0;
    cmd[4].m_coord[6] = 0;

    cmd[4].m_position[0] = 0;
    cmd[4].m_position[1] = 5;
    cmd[4].m_position[2] = 5;
    cmd[4].m_position[3] = 5;
    cmd[4].m_position[4] = 5;
    cmd[4].m_position[5] = 5;


    cmd[5].cmdType = cmdPara::MOVCA;
    cmd[5].m_velocity = 300;
    cmd[5].m_acc = 30;
    cmd[5].m_dec = 30;
    cmd[5].m_pl = 0;
    cmd[5].m_spin = 0;

    cmd[5].m_coord[0] = 0;
    cmd[5].m_coord[1] = 0;
    cmd[5].m_coord[2] = 0;
    cmd[5].m_coord[3] = 0;
    cmd[5].m_coord[4] = 0;
    cmd[5].m_coord[5] = 0;
    cmd[5].m_coord[6] = 0;

    cmd[5].m_position[0] = 15;
    cmd[5].m_position[1] = 15;
    cmd[5].m_position[2] = 15;
    cmd[5].m_position[3] = 15;
    cmd[5].m_position[4] = 15;
    cmd[5].m_position[5] = 15;

    send_continuous_motion_queue(cmd,6);
}
Create instruction queue structure array cmdPara cmd[6];
- Group 1 - Joint motion, vel=30%, acc=30, dec=30, pl=0, target point (0,0,0,0,0,0) in joint coordinate system
- Group 2 - Linear motion, vel=300mm/s, acc=30, dec=30, pl=0, target point (10,10,10,10,10,10) in joint coordinate system
- Group 3 and group 4: Circular motion, vel=300mm/s, acc=30, dec=30, pl=0, circular motion through the target point (20,20,0,0,0,0) in joint coordinate system and the target point (0,0,0,0,0,0) in joint coordinate system
- Group 5 and group 6: Full circle motion, vel=300mm/s, acc=30, dec=30, pl=0, full circle motion through the target point (0,5,5,5,5,5) in joint coordinate system and the target point (15,15,15,15,15,15) in joint coordinate system
Instruction structure description:
- MOVJ: Joint motion
- MOVL: Linear motion
- MOVC: Circular motion
- MOVCA: Full Circle motion
- MOVJEXT: Joint motion with external axes
- MOVLEXT: Linear motion with external axes
- MOVCEXT: Circular motion with external axes
- double m_velocity: Velocity. The velocity range for joint motion is 1-100%, while the velocity range for non-joint motion is 2~1000mm/s
- double m_acc: Acceleration. The range is 1~100
- double m_dec: Deceleration. The range is 1~100
- double m_pl: Smoothness. The range is 0~5
- int m_spin: Attitude (only required for MOVCA). 0: Attitude unchanged; 1: 6-axis non-rotating; 2: 6-axis rotating
- double m_coordfirst and second elements represent the coordinates, the third element represents left or right hand (0-none, 1-left, 2-right)/attitude (0-8), the fourth element represents the tool hand, the fifth element represents the coordinate system, and the sixth and seventh elements are reserved
- double m_positionfirst to seventh elements represent the robot point coordinates (supports up to a 7-axis robot, fill with 0 if no position is available)
- double m_syncPositionfirst to fifth elements represent the external axis point coordinates (supports up to five external axes, fill with 0 if no position is available)
Note:
For circular motion, full circle motion, and circular motion with external axes, the instructions must be used in pairs, otherwise they will not be executed
If you want to increase the speed in continuous motion mode, you can modify the global speed in the current mode using the interface void set_jogging_speed(int speed); speed range (0~100)
During the operation, if the set target points are not completed according to your own needs, the following situations may occur:
- The target position is unreachable
- The target position of some axes exceeds the limit
- The speed is too high, causing a servo error
- There is a problem with the program content
- Not in continuous motion mode of the run mode
- There is a problem with the servo status
It is recommended to debug the points in advance through teaching to see if they can be reached, and then use PC secondary development to set the points